How to Start Seeds Indoors Step by Step
The first time I started seeds indoors, I put them on a windowsill, watered them faithfully, and waited. What grew was pathetic: tall, spindly, pale seedlings that leaned desperately toward the window like tiny green zombies. They were so weak they couldn't support their own weight. When I transplanted them outside, most of them keeled over and died. I nearly gave up on seed starting entirely.
Then a gardening friend showed me her setup: a simple wire shelf in her basement with a $20 shop light and a $15 heat mat. Her seedlings were stocky, green, vigorous little tanks compared to my sad windowsill noodles. The difference wasn't skill — it was light and warmth. Two things that are easy and cheap to provide once you know they're needed.
Starting seeds indoors is a skill that saves you serious money ($3 packet of seeds = 50+ plants vs. $5 per transplant at the nursery) and opens up a world of variety that garden centers don't carry. Here's everything I've learned from a decade of starting thousands of seedlings every year.
What You Actually Need (And What You Don't)
The essentials: Seed-starting trays or cell packs (reusable 72-cell flats are my standard), sterile seed-starting mix (NOT potting soil — it's too heavy and can contain disease organisms), a spray bottle for gentle watering, clear humidity domes or plastic wrap, a light source, and seeds.
A heat mat ($15-25) is technically optional but practically essential. It raises soil temperature to the 70-80°F sweet spot that most seeds need for germination. Without one, seeds planted in a 65°F house will germinate, but slowly and unevenly. With one, you get faster, more uniform germination. It's the best $20 you'll spend on gardening equipment.
What you DON'T need: expensive grow light systems (a basic $15-20 LED shop light works perfectly), fancy propagation chambers, special seed-starting fertilizers (seeds contain their own startup nutrients), or anything marketed as 'professional grade' for three times the price of the basic version.
Sowing: The Art of Putting Seeds in Dirt
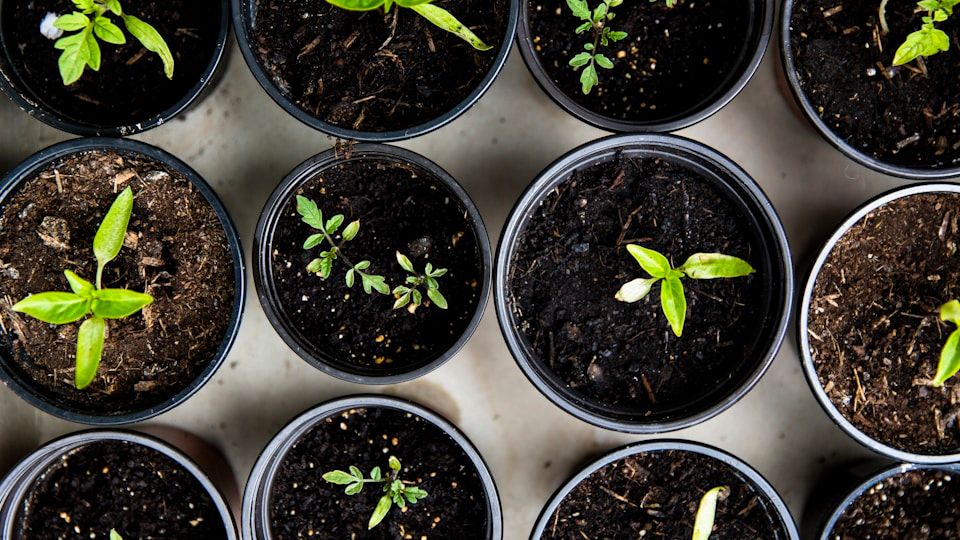
Start by moistening your seed-starting mix in a large bowl or bucket. Add water gradually and mix with your hands until the consistency is like a wrung-out sponge — damp throughout but not dripping wet. Fill your cell trays to the top, tapping lightly to settle without compressing.
Plant seeds at the depth specified on the packet. The general rule of thumb: plant twice as deep as the seed is wide. Tiny seeds (lettuce, basil, flowers) get pressed into the surface and barely covered. Medium seeds (tomatoes, peppers) go about 1/4 inch deep. Large seeds (squash, beans — though these are better direct-sown) go 1/2 to 1 inch deep.
After sowing, mist the surface gently and cover trays with a humidity dome or plastic wrap. This creates a mini-greenhouse effect that maintains the warmth and moisture seeds need to germinate. Place on a heat mat set to 75-80°F. At this stage, seeds don't need light — they need warmth and moisture.
Check daily. As soon as you see the first green shoot break the surface, remove the humidity dome immediately and get them under lights. Seedlings under a dome in warmth without light will stretch and weaken within a day.
Light: The Most Common Mistake and the Easiest Fix
Insufficient light is the number-one reason indoor seedlings fail. A south-facing window provides 2-4 hours of usable light even on a sunny day — seedlings need 14-16 hours. The result of inadequate light is 'leggy' seedlings: tall, thin, pale stems reaching desperately for more light. Leggy seedlings are weak, transplant poorly, and often don't survive the transition to the outdoors.
The fix is easy and cheap: a basic LED shop light hung on chains from a wire shelf, positioned 2-3 inches above the seedlings. Move the light up as plants grow, always maintaining that 2-3 inch distance. Run it for 14-16 hours per day (a $5 timer is worth it). The seedlings you produce under artificial light will be dramatically healthier than any windowsill seedling — stocky, dark green, and strong.
I use a $25 4-foot LED shop light from the hardware store. Two of them side by side fit perfectly over a standard 10x20 inch seed tray and illuminate a full flat of 72 cells. My total lighting setup for four trays costs about $100 and lasts for years. It produces hundreds of transplants per season — each one replacing a $4-6 nursery transplant.
Watering Seedlings: The Goldilocks Zone
Seedlings need to stay moist but never waterlogged. Overwatering causes damping off — a fungal disease where seedlings keel over at the soil line as if someone pinched them. It's devastating and fast. One day they look fine, the next morning half your tray is down.
Water from the bottom whenever possible. Set your cell tray in a shallow pan of water and let the soil wick moisture upward for 10-15 minutes, then remove the tray and let it drain. This keeps the soil surface slightly drier (reducing damping off risk) while ensuring roots are evenly moist.
Improve air circulation around seedlings. A small fan on low, directed near (not directly at) your seedlings, serves double duty: it reduces the still, humid conditions that favor damping off, and the gentle breeze actually strengthens stems. Wind-stressed seedlings develop thicker, stronger stems that hold up better when transplanted outside.
The Timing Puzzle: When to Start What
Every seed packet lists 'days to maturity' and 'start indoors X weeks before last frost.' These two pieces of information, combined with your local last frost date, tell you exactly when to start each crop.
The general guidelines: Onions and leeks: 10-12 weeks before last frost (these are the first seeds I start, usually in January). Peppers and eggplant: 8-10 weeks before last frost. Tomatoes: 6-8 weeks before last frost. Broccoli, cabbage, kale: 6-8 weeks before last frost. Lettuce: 4-6 weeks before last frost. Herbs (basil, parsley, cilantro): 4-6 weeks before last frost.
Starting too early is as much of a problem as starting too late. Seedlings that spend too long in small cells become root-bound and stressed. They might look big and impressive indoors, but they transplant poorly compared to younger, vigorous seedlings. When in doubt, err on the later side — a smaller, younger transplant often outperforms a larger, older one.
Hardening Off: The Bridge Between Indoors and Out
This step is critically important and frequently skipped (with disastrous results). Seedlings grown indoors have never experienced direct sunlight, wind, temperature swings, or UV radiation. Moving them straight from your basement to the garden is like pushing someone from a heated office into a blizzard.
Hardening off is a gradual transition over 7-10 days. Day 1-2: Place seedlings outdoors in a sheltered, shady spot for 2-3 hours. Bring them back inside. Day 3-4: Increase to 4-5 hours with some morning sun. Day 5-6: 6-8 hours with afternoon sun. Day 7-8: Leave them out all day in full sun. Day 9-10: Leave them out overnight (if no frost threat). Then transplant.
I know this sounds tedious. It is. But the alternative is watching your carefully raised seedlings sunburn, wilt, and die within 48 hours of transplanting. I've done that exactly once. Never again.
After transplanting, water deeply, mulch around (not against) the stems, and provide shade for the first 2-3 days if it's very sunny. A propped-up piece of cardboard or a lawn chair placed to cast shade works fine. After that, your seedlings are on their own — and they'll thrive because you gave them a strong start.